Monday, November 25, 2013

Camera Shots & Angles


Camera Shots & Angles

-Extreme long shot: A wider frame value in which subjects in the frame are small; a building, cityscape.


-Long shot: A value of framing where the whole subject is relatively small enough to fit the height of the frame.


-Full shot: A type of long shot which includes the human body in full, with the head near the top of the frame and the feet near the bottom.


-Mid shot: A value of framing in which the subject is a bit smaller than a medium close-up; a human figure from the waist up.

-Close up: A value of framing where the size of the subject is relatively large and fills most of the frame. For instance a person’s head seen from the neck up, or an object seen in detail.


-Extreme close up: A closer frame value than a close-up; i.e. showing parts of the face or greater detail of an object.


.Blue eye. Extreme close-up. High key. Stock Photo - 1282945 


-Birds eye: A shot in which the camera photographs a scene from directly overhead.


-High Angle: A shot in which the subject is photographed from above.


-Low Angle: A shot in which the subject is photographed from below.


-Eye level: The placement of the camera approximately 5 to 6 feet from the ground corresponding to the height of an observer on the scene.


My three favorite shots:

1. Long shot: I think the long shot is a good way to take a picture of the beautiful scenery.
When I take a picture of a nature or building, I would like to include all of surroundings so that it can fit into my angle.

2. Close up: In close up, the object fills most of the frame, so I can see what really this looks like.
It can discover the specific or unknown characteristic of the object.

3. Eye level: I think this is a good angle to close up an object. I do not want to distort the object so I can just take a picture of what it really is.

Thursday, November 7, 2013

Shoe_playblast


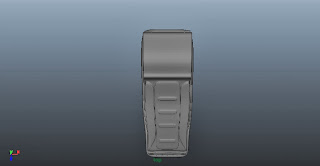
These are perspective view, top view, side view, and front view.

Wednesday, November 6, 2013

Shoe_sketch


These are sketches of my shoes-top,side, and front. The side view was the easiest. However, it was
hard to think front view and proportion of the top view.

Tuesday, April 23, 2013

Advertisement w/You


The top one is the final copy of this project.

I used the focused shot image of the glamour shots because it showed the clear face of me.

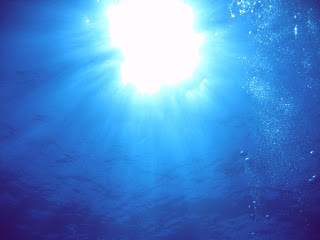
I used the sea image as the background.

I set the face of me to the side and used the sea turtle image.

I wanted to show the playful image to the audience.

The turtle is trying to reach the perfume, deep in the sea.

I used the elegant perfume image to show that the audience thinks it is also mature.

I changed the blend modes of the face and turtle layer to luminosity.

This blend mode made the object in the layer look like being in the sea.

I added sillhoutte of me.

Then, I added more makeup techniques.

The pattern of the sea turtle is so clear.

So I applied the Median filter and used brush tool to paint eyes on a layer mask.

The turtle had smooth skin tone and texture.

Then, I added a vignette effect because I wanted to darken the some areas of the background.

I selected the ellipse and used Brightness/Contrast adjustment.

Also, I used Radial Gradient so that it looked like more sea.

Finally, I added the slogan.

I wanted to show clear, sharp typography.

I added inner shadow, and other effects to the typography.


Wednesday, April 17, 2013

Glamour shots.2


4. Highpass


I created the layer copy and applied the High Pass filter.

I applied the lower radius values because I did not want to sharpen any non-edge areas.

Then I changed the blend mode to hard light and reduced the opacity.

The final image looks like a sharpening image.


5. A bit of color in black and white


I used Desaturate effect to the image.

Then I used the History Brush tool.

I could paint back the part that I selected to colorize back to the original color.

I painted the lips because it had clear color.


Tuesday, April 16, 2013

Glamour shots


1.Focused shot

I used Gaussian Blur tool to make it blurred.

I changed the opacity about 80% and used brush tool to paint a layer mask.

I painted the whole face, especially the eyes and the lips to highlight.

Then, I changed the Hue/Saturation to give subtle change.

I made little darker and lower the Saturation.


2. Vignettes

At first, I desaturated the image.

I selected around the face using the Elliptical Marquee tool and used Brightness/Contrast adjustment

to create the vigneete.

Then, I used Lens Correction effect.

I did not see huge difference, it was just dark image.

I used Radial Gradient tool and Dodge/Burn tool.

Now the edges around the face looks darker.


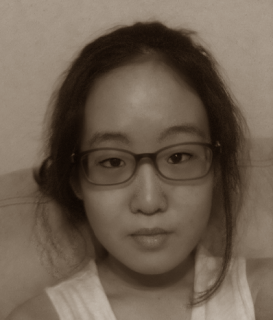
3. Sepia tone

This tutorial was the shortest tutorial.

I selected Image>Mode>RGB Color and clicked More Yellow and More Red once.

It looked like old-fashioned image.

However, it would be better if the image is full-body shot.


Thursday, April 11, 2013

Makeup over.EDIT


The bottom one is the final copy.

First, I used filiter effect to change the skin tone.

I changed the iris color little lighter.

I wanted to make the eyeball clear and white, so I painted it with white brush.

Also, I painted around the iris to highlight.

I changed the blend mode to Hue, but it didn't turn out clearly because the iris color is black!

I painted the eyeball with white color.

I highlighted the eyeball and changed blend modes, but the iris color is dark so that

it didn't turned out clearly.

I painted the eyebrow with brown because the eyebrows are gone!!

I made eyelines with black brush.

Then, I painted the lip with more red color.

I painted the hair using brown color brush.

All steps were not complicated. All I did was using paint brush tool and changing the blend mode and opacity.

However, this project was little hard..

Making up my face was hard. My hair and iris color is black, so final copy looks funny.

I couldn't make lots of changes.

I also made other person makeup. It looks like better.


Monday, April 8, 2013

Makeup

1. Modifying Nose (profile)

I learned Filter > Liquify effect to modify nose. Shrinking nose part was easy.

I had to click just the inside edge of the area.


2. Changing Hair Color

I learned Quick Mask mode.

It was useful because the brush painted a

transparent red when I paint over the person's hair.

I made a selection and used Hue/Saturation effect.

This step was easy and fun.


3. Eye make up

I used brush tool to paint around the eye. Also, I used eyedropper tool to make an eyeliner.

The brush part was easy, but I changed the opacity of the layer carefully.


4. Whiten Teeth

This tutorial was the shortest. All I did was using dodge tool to whiten teeth and eyes.

However, I think this was too white.


5. Wrinkle Removal 

I used the Healing Brush tool to remove wrinkle.

This part was easy, but I really use Healing Brush tool carefully.


6. Skin tone

The lower one is the final copy.

I made a selection around the cheek and fill selection on new layer, then I adjusted layer's blend mode

and opacity. It was easy, but the difference between two pictures are small.